Definition
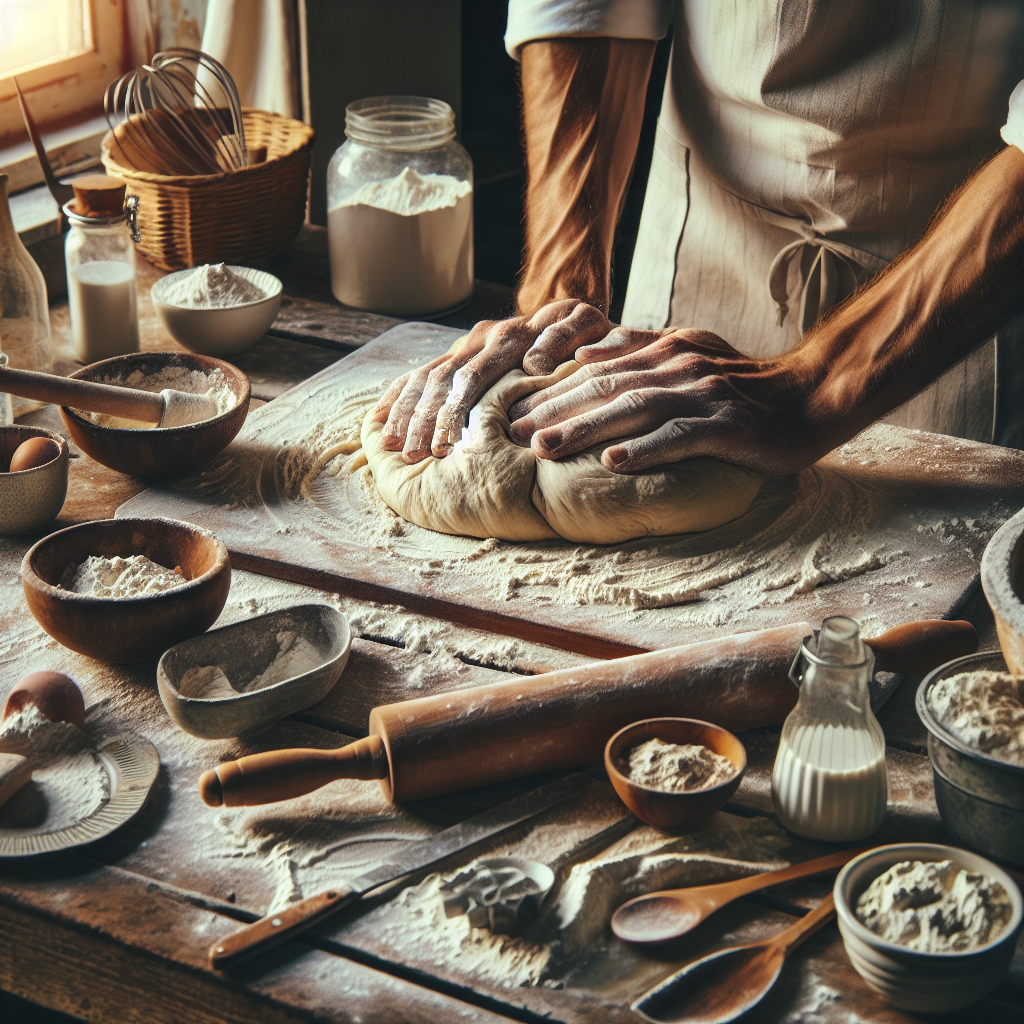
Knead means to work and press dough or clay with the hands.
Mechanisms
Kneading: When making bread or pizza dough, kneading is essential to develop gluten and create a smooth, elastic dough. This is typically done by pressing the dough with the heels of your hands, folding it over, and repeating the process for about 10-15 minutes.
Resting: After kneading, allow the dough to rest for about 10-30 minutes. This helps the gluten relax, making the dough easier to shape and providing a better texture in the final product.
Rising: After shaping the dough, let it rise in a warm, draft-free place until it has doubled in size. This usually takes about 1-2 hours, but can vary depending on the recipe and the temperature of your kitchen.
Baking: When it comes to baking, preheat your oven to the temperature specified in the recipe and bake the dough until it is golden brown and sounds hollow when tapped on the bottom. This can take anywhere from 20-40 minutes depending on the type and size of the dough.
Dualities
Kneading Time vs. Over Kneading: When it comes to kneading dough for bread or pastry, achieving the right balance is crucial. Kneading too little can result in an uneven texture and lack of gluten development, while over-kneading can make the dough tough and dense. Finding the perfect kneading time will result in a smooth, elastic dough that rises well and has a good crumb structure.
Kneading and Yeast Activation: Proper kneading helps to evenly distribute the yeast throughout the dough, allowing for better fermentation and rise. When the dough is kneaded to the right consistency, it creates a strong gluten network that can trap the carbon dioxide produced by the yeast, resulting in a light and airy texture. Under-kneading can lead to uneven fermentation and a dense final product.
Kneading in Different Recipes: Kneading techniques may vary depending on the recipe. For example, bread dough requires a longer kneading time to develop gluten, while pastry dough needs to be handled delicately to prevent overworking the dough and creating a tough crust. Understanding the specific requirements for each recipe will help achieve the desired texture and structure.
Kneading and Flavors: Kneading also plays a role in developing flavors in certain baked goods. For example, kneading bread dough helps to evenly distribute ingredients like herbs, spices, or seeds, resulting in a more flavorful end product. Over-kneading, however, can lead to a loss of the delicate flavors and textures in the final baked goods. Kneading creates a balance between structure and taste, ensuring that every bite delivers a uniform and satisfying flavor. Similarly, understanding techniques in other culinary arts, such as nappé sauce preparation basics, emphasizes the importance of achieving the right consistency and even distribution of flavors. Whether crafting bread or perfecting a sauce, carefully handling ingredients can greatly impact the harmony of textures and tastes.
Culinary Techniques
When making bread, kneading the dough is essential for developing gluten, which helps give bread its structure and chewy texture. To knead, press the dough with the heels of your hands, fold it in half, then give it a quarter turn and repeat. You’ll know your dough is ready when it’s smooth, elastic, and no longer sticky. Kneading can be quite a workout, so take breaks if needed and don’t be discouraged if it takes some practice to get the hang of it.
After kneading the dough, it’s important to let it rest or proof to allow the gluten to relax and the yeast to do its job. This will result in a better texture and rise in your bread. Depending on the recipe, proofing times can vary, so be sure to follow the instructions carefully for the best results.
Nutritional Frameworks
Nutritional Frameworks for Knead:
Protein Content: Adding ingredients like chickpea flour or whole wheat flour to the knead can increase the protein content of the final product. This is beneficial for muscle repair and overall body function.
Fiber: Including ingredients such as whole wheat or oat flour in the knead can increase the fiber content of the final product. Fiber is important for digestive health and can help with feelings of fullness and weight management.
Micronutrients: Adding ingredients like ground flaxseed or chia seeds to the knead can increase the micronutrient content of the final product, providing essential nutrients like Omega-3 fatty acids and various vitamins and minerals for overall health.
Food Safety Protocols
Kneading bread dough is a fundamental step in the bread-making process, but it’s important to adhere to food safety protocols to ensure the safety of the final product. Here are some key safety tips:
Clean Hands and Surfaces: Before kneading dough, wash your hands and work surfaces thoroughly to prevent the transfer of bacteria to the dough.
Proper Storage: Store yeast and other bread-making ingredients in a cool, dry place to prevent spoilage. Once the dough is made, store it in a clean, airtight container or covered bowl in the refrigerator to slow down the growth of bacteria.
Temperature Control: Ensure that the dough is not left out at room temperature for an extended period. Bacteria grows rapidly between 40°F and 140°F, so it’s important to refrigerate or freeze the dough if not using it immediately.
Baking: When baking bread, ensure that it reaches the appropriate internal temperature to kill any potential bacteria. The internal temperature should reach at least 190°F for most bread types.
By following these protocols, you can enjoy freshly made bread with the assurance that it’s safe to eat.
Core Elements in Recipe
Kneading dough properly is essential for a successful bread or pizza crust. Here are the core elements:
Flour: Choose the right type of flour for your recipe, whether it’s all-purpose, bread flour, or whole wheat flour. The protein content in the flour affects the gluten development, which is crucial for the dough’s structure.
Yeast: If your recipe calls for yeast, it’s important to activate it properly by dissolving it in warm water with a pinch of sugar. This helps the yeast become active and frothy before adding it to the flour.
Kneading Technique: Use the heel of your hand to push the dough away from you, then fold it back over itself. Rotate the dough a quarter turn and repeat. This process develops the gluten, which gives the dough its structure and elasticity.
Time: Knead the dough for the recommended amount of time in the recipe. This allows the gluten to develop properly, resulting in a dough that rises well and has a good texture.
Resting: After kneading, the dough usually requires a resting period to allow the gluten to relax. This makes the dough easier to shape and prevents it from springing back.
By following these core elements, you can ensure your dough is properly developed and ready for baking. Remember, a well-kneaded dough should be smooth, elastic, and slightly tacky to the touch.
Stats and Facts
Texture: Kneading bread dough for the right amount of time is crucial for developing gluten, which creates the bread’s structure and texture. Under-kneading can result in a dense, tough loaf, while over-kneading can make the bread too chewy or even lead to a collapsed structure.
Rising Time: Allowing bread dough to rise for the appropriate amount of time is vital for achieving the desired texture and flavor. Over-proofed dough can result in a flatter and denser loaf, while under-proofed dough can lead to a tighter, less airy crumb.
Baking Temperature: Baking bread at the right temperature is essential for proper oven spring, which is the final rise of the dough in the oven. Baking at too low of a temperature can result in a dense, undercooked interior, while baking at too high of a temperature can cause the bread to burn on the outside before it is fully baked inside.
Internal Temperature: When baking bread, it’s important to ensure it reaches the correct internal temperature for doneness. The internal temperature for bread should reach about 190-210°F (88-99°C) to ensure that the bread is fully cooked and has developed the desired texture.
Cooking Alternatives
1. Dietary Needs: Low-Carb Options
For those looking to reduce their carbohydrate intake, there are low-carb pasta alternatives made from ingredients such as konjac, chickpeas, or zucchini. These options can be cooked al dente to mimic the texture of traditional pasta while being lower in carbs.
2. Vegan/Vegetarian Substitutions
To cater to vegans and vegetarians, use plant-based protein alternatives such as tempeh, seitan, or jackfruit as toppings for the al dente pasta. Pair with vegan alfredo or creamy tomato sauces made with dairy-free milk and nutritional yeast.
3. Budget-Friendly Options
To save money, opt for dried pasta over fresh, as dried pasta is typically more affordable and can still be cooked to al dente perfection. Additionally, consider making homemade pasta from scratch using basic ingredients like flour and water for a budget-friendly option.
4. Global Cuisines Alternatives
Explore different global cuisines by using pasta varieties specific to regions like Asia, such as rice noodles or mung bean vermicelli. Pair these with traditional Asian flavors like sesame oil, soy sauce, and fresh herbs for an authentic al dente experience.
5. Healthy Eating
For a healthier twist, swap traditional pasta for spiralized vegetables like zucchini or sweet potato noodles, which can be cooked al dente in a fraction of the time and add extra nutrients to the dish. Pair with a light, homemade tomato or olive oil-based sauce for a healthy, low-calorie meal.